


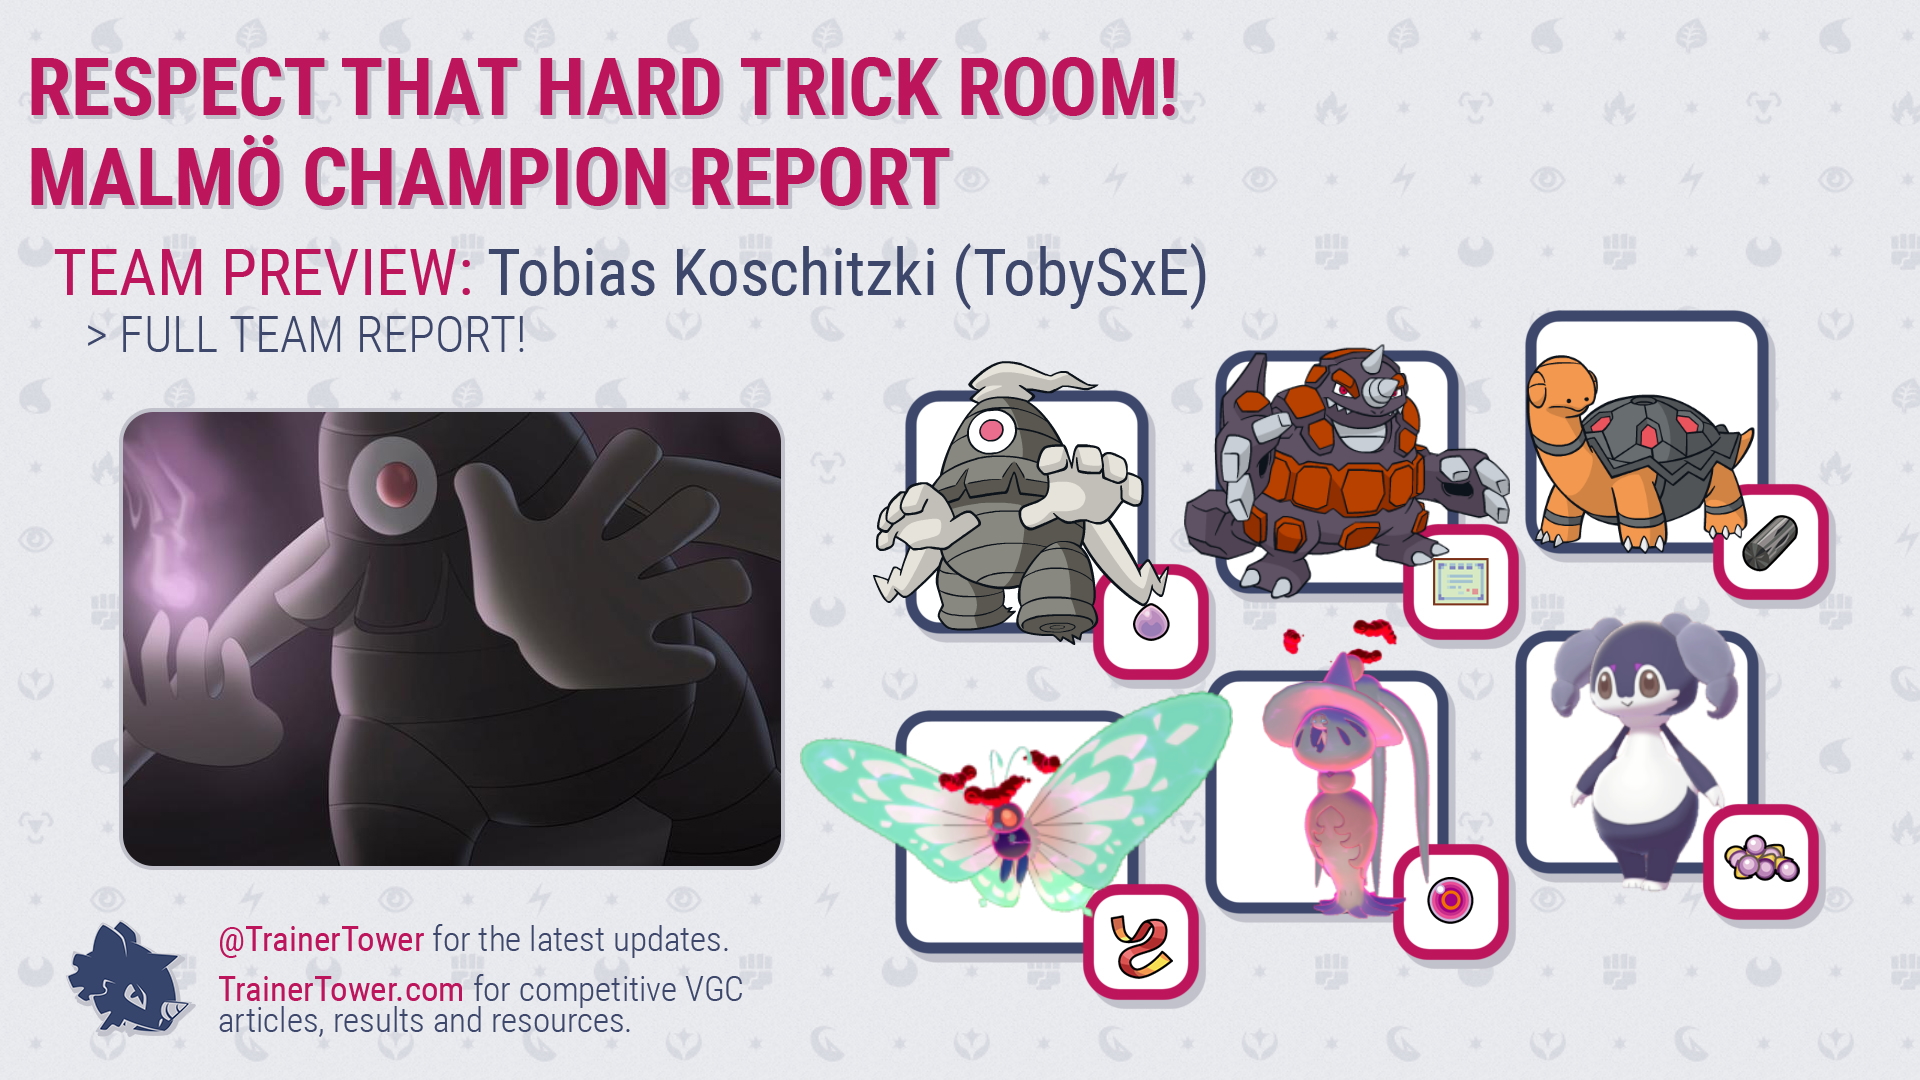
Respect That Hard Trick Room! – Malmö Champion Report
My name is Tobias Koschitzki, also known as TobySxE in the Pokémon community. I’ve been playing competitively since 2015 and had a lot of success while actively playing, which was up until 2017. During that period of time, a lot of people would occasionally ask if I could maybe write a report of teams I did well with at tournaments. I always was like, ‘yeah, sure, I’ll probably do that, but only if I win something bigger’. So, I guess it’s about time to say: welcome to my first ever Regionals report.
Teambuilding and Selection Process
For anyone who knows me, it wouldn’t come as a surprise if I told you that I do not consider myself a “generally good teambuilder,” but rather a “perfectionist” when it comes to the smaller choices. This makes me someone who has a good feel about what could do well. Since series 3 came out just one week before the tournament, I really wanted to use one of the three new good G-max Pokémon: Lapras, Charizard, or Hatterene.
I tested an archetype which gained some popularity in Japan during series 2, consisting of G-Max Solar Power Charizard, Sableye, and Conkeldurr, which was mostly the team that fluWhite16 built. But I felt that team had a rough time dealing with a Tyranitar and Togekiss lead, like a lot of Charizard based teams. Lapras, Incineroar, and Gothitelle teams gained a lot of popularity in the early stages of series 3, and while I liked the idea of it, I thought the skill cap for this kind of archetype is really high, and there wasn’t enough time left for me to master it. I also was expecting to play a lot of mirrors or teams well prepared against that archetype, and I didn’t want to have to deal with that.
Around a month before the tournament, I talked to my good friend Dominic Scheffler about how I’d had a pretty rough time in the format so far and didn’t know what I should play. He told me I should really try out hard Trick Room, so after talking to him I scouted the Doubles OU ladder on Showdown and saw the exact six Pokémon which would later become my Regionals team. We built with those six and made some changes so that it fit better in the VGC format.
One week later, I saw Jun rocking the same six with huge success at two MSS events in NYC, making finals in one and becoming the champion of the other. Another friend of mine, Jonas Wiegel, finished 6-3 at Collinsville Regionals without any clue about the current meta using Trick Room, so I started believing more and more that hard Trick Room is actually pretty good if you play it well. Also, with G-Max Hatterene around the corner, I thought it would be even more flexible. I also had the feeling everyone was focusing on Lapras as “the big new G-Max Pokémon” a week before the tournament. That’s why I decided to run a more forgotten archetype and called my team ‘Atlantis’. If you look at my team, it looks very vanilla, as if taken from early January, but there’s more to it, so let’s jump into details!
The Team
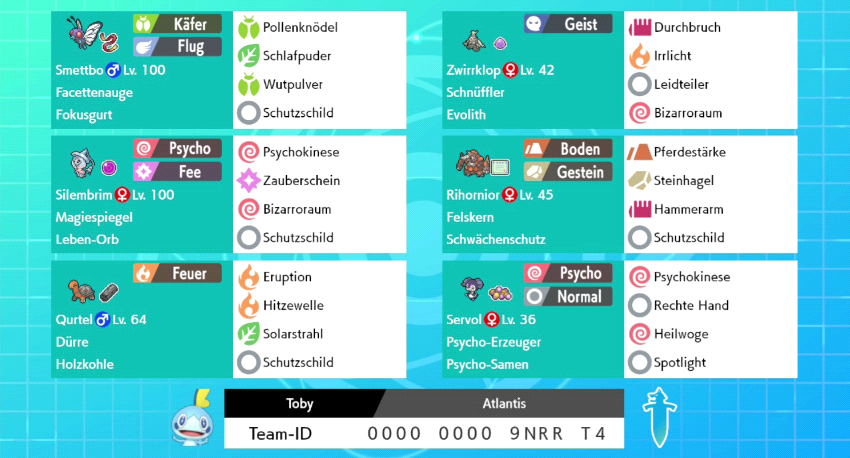

Dusclops @ Eviolite
Ability: Frisk
Level: 50
EVs: 220 HP / 164 Def / 124 SpD
Relaxed Nature
IVs: 0 Spe
– Brick Break
– Pain Split
– Will-O-Wisp
– Trick Room
I think Dusclops is by far the most consistent Trick Room setter in this format, and the heart of this team. Frisk is one of the best Abilities, since immediately knowing your opponent’s items helps you adjust your game plan. Not opting for the standard 252/252 Relaxed split, I decided to run less HP investment to minimize the damage it would take from Sand, Hail and Burn, which also synergized pretty well with Pain Split. I wanted to live both special and physical Life Orb Dragapult, and the special bulk also helps versus Duraludon, because I decided to run Life Orb instead of Babiri Berry on Hatterene.
It’s pretty tough to KO this Dusclops in one hit, especially after setting up Trick Room and having the option to recover with Pain Split. Pain Split also allows me to get multiple Trick Rooms up, which is what the team really needs. I also decided to run Brick Break over the often-seen Bulldoze. Brick Break might not be as consistent as Bulldoze in activating your Weakness Policy because of redirection, but you KO the most popular re-direction Pokémon in Togekiss anyway with Max Rockfall from Rhyperior. It has far more pros than cons, as it allows me to activate my own Weakness Policy without activating my opponent’s one, avoids giving my opponent’s Competitive / Defiant users a boost (most importantly Milotic), and is also able to break Screens from Lapras or, in rarer cases, Grimmsnarl and Alolan Ninetales, which is really nice. Will-O-Wisp is just an overall solid move in a physical meta like this, and it allows me to have outs versus Mudsdale, which the team otherwise struggles against.

Rhyperior @ Weakness Policy
Ability: Solid Rock
Level: 50
EVs: 132 HP / 244 Atk / 132 SpD
Brave Nature
IVs: 0 Spe
– High Horsepower
– Rock Slide
– Hammer Arm
– Protect
Rhyperior is one of the best Trick Room sweepers and I feel it benefits a lot from investing into Special Defence. I can also see why you would want HP investment, with Dynamaxing giving it doubled HP for three turns, so I opted for the best of both worlds. The HP stat is 16n-1, and the Special Defence stat is even so that I get more out of the Special Defense stat and Sand boost while still maximizing its Attack. I was thinking about if I should go for another Speed stat to avoid potential Speed ties, but then decided that if I play a full Trick Room team then I want to be as slow as I can be. The moveset is pretty standard, except for Hammer Arm. Hammer Arm was there for Rhyperior to be able to boost its Attack stat on its own while Dynamaxed and to be able to drop its own Speed even further outside of Dynamax. You also did not have to deal with the negative side effects of Superpower. That said, sometimes I really missed a 100% accurate move on it.

Hatterene-Gmax @ Life Orb
Ability: Magic Bounce
Level: 50
EVs: 212 HP / 44 Def / 252 SpA
Quiet Nature
IVs: 0 Atk / 0 Spe
– Psychic
– Dazzling Gleam
– Trick Room
– Protect
The 2nd Trick Room setter-and-sweeper-in-one was G-Max Hatterene. This is one of the few cases where being able to G-Max is a straight upgrade. Before, it felt like you weren’t really able to Dynamax Hatterene because you would switch between terrains due to secondary effects of Dynamax moves, when most of the time you just want that Psychic Terrain so your opponent can’t stall Trick Room turns with Fake Out. With its G-Max move confusing both of the opposing Pokémon, it makes it even harder for your opponents to stall, as if they try to Protect then they may get confused and get KO’d anyway. I was writing with my good friend Till Böhmer, who also built a G-Max Hatterene team. When I told him I wasn’t sure if I should run Babiri Berry or Life Orb, he told me I should definitely run Life Orb on Hatterene. I then went back into testing and the damage output was just insane, while the Berry only helped in the Duraludon matchup. So I think it was okay to have a less optimal Duraludon matchup, but a better matchup against most other teams.
The HP stat is, again, 16n-1 and optimizes the damage you take from Life Orb. The Special Attack is maximized, and I didn’t really know where to put the last 44 EVs. With Babiri Berry, I had them in Special Defence against Duraludon, but I felt it would be the best to get pretty similar physical and special bulk stats, so put it into the Defence Stat.

Indeedee-F @ Psychic Seed
Ability: Psychic Surge
Level: 50
EVs: 236 HP / 252 Def / 20 SpD
Relaxed Nature
IVs: 0 Atk / 0 Spe
– Psychic
– Follow Me
– Helping Hand
– Heal Pulse
Firstly, let me share a fun story!
Some of you may remember the tweet I made a few days before Malmö, where I was asking for teams because I had last minute doubts in my decision. My friend Yuki Zaninovich hit me up with his 11th place OCIC team and I was like, ‘well, it looks great, but I don’t have the time to get good with a standard team that I have no experience with.’ Afterwards, I spoke with him about my six and he helped me to make the last fine-tuning requirements. I was running Calm Nature with Sitrus Berry on my Indeedee, but thought Yuki’s Psychic Seed Indeedee was really good, so I decided I wanted that as well to get more physical and special bulk out of it. Helping Hand with Hatterene is incredibly powerful, and there aren’t a lot of Pokémon around who can take a boosted hit. In the last slot, I tested Protect, Healing Wish, Ally Switch, and even Fake Out, but decided to go for Heal Pulse to give my team more staying power and also allow me to go for the heal on my own Indeedee with Magic Bounce Hatterene.

Butterfree-Gmax @ Focus Sash
Ability: Compound Eyes
Level: 50
EVs: 188 HP / 4 Def / 60 SpA / 4 SpD / 252 Spe
Timid Nature
IVs: 0 Atk
– Pollen Puff
– Sleep Powder
– Rage Powder
– Protect
Pretty standard Butterfree moveset with max Speed, but it wouldn’t be me if I didn’t go for a good HP stat. It was mainly there because people fear Sleep a lot and often just go for the double target, which allows me to get a free switch in to one of my Trick Room sweepers while setting up Trick Room with the Pokémon next to the Butterfree. It also functions well against slower, bulkier teams, since I can disrupt them with Sleep Powder spam.

Torkoal @ Charcoal
Ability: Drought
Level: 50
EVs: 236 HP / 252 SpA / 20 SpD
Quiet Nature
IVs: 0 Atk / 0 Spe
– Eruption
– Heat Wave
– Solar Beam
– Protect
Yeah, you’ve read this a lot: the HP stat is, yet again, 16n-1. Torkoal is probably the weakest part of the team. I mean, Eruption spam can be good as there aren’t a lot of Pokémon that are able to take more than 2 hits from it, but with the high Tyranitar usage and manual weather with Dynamax (which allows Pokémon to tank Torkoal’s moves quite easily), it’s a lot tougher to get it in the right position. Maybe I also just played the wrong matchups in Malmö for it to really shine.
Typical Leads
Trick Room Setter (Dusclops / Hatterene) with Redirection (Indeedee / Butterfree)
This is the most common mode of the team: just redirect and set up Trick Room. If your opponent has a lot of spread moves, then go with Dusclops instead of Hatterene to safely set up Trick Room. Indeedee is so good against all Prankster Pokémon, whereas Butterfree allows you to get the easier free switch-in or be disruptive against defensively orientated teams.
Rhyperior with Redirection (Indeedee / Butterfree)
This is the lead I went for when I saw an Imprison Pokémon like Chandelure on my opponents’ team. It allows you to go for the KO against the Imprison Pokémon while redirecting any super effective attacks from Rhyperior and then set up Trick Room in the late game. This and the following leads were also useful against double Rock Slide leads against some opponents.
Dusclops with Sweeper (Rhyperior / Hatterene)
If I don’t need redirection to set up Trick Room, I can get a lot of pressure right from the beginning on my opponents. With the options to directly attack with my sweepers outside of Trick Room or just going for a simple Protect and Trick Room play, I can immediately apply pressure. Also, my opponent has to fear a potential Protect from Rhyperior, and can’t just freely attack into it with their Dynamax Pokémon, because they may just activate my Weakness Policy for me.
Rundown of Tournament
Round 1 vs Flavio Del Pidio (L W W)
You can probably imagine easier opponents than playing Pado in the first round of Regionals.
Game 1: His team looked really scary, and I went with Indeedee and Dusclops as my lead, expecting Coalossal plus Dragapult. I went for Follow Me and Trick Room, but he just used Surf, doing over 50% to his own non-Dynamaxed Coalossal, which Rock Slide flinched my Dusclops. On the second turn he made a clever play by Dynamaxing his Scarf Dragapult, which KO’d Dusclops after removing my redirection Pokémon with Coalossal before, so it was GG.
Game 2: I was thinking, “well, I probably win this set over 70% of the time if I just get up my Trick Room the first turn”, so I went for the same lead. This time, he fortunately missed Rock Slide on my Dusclops, which allowed me to get up Trick Room. I managed to sweep him with Rhyperior afterwards.
Game 3: I figured that now he was going to bring Venusaur, and I was right, but I still went with the same lead as it gave me the most options against his team. I immediately burned my first Sleep turn by just attacking with Indeedee. His Dragapult used Phantom Force and I got Trick Room off. I went for Will-O-Wisp against his Venusaur to break his Focus Sash and went for Psychic. Unfortunately, I didn’t land the Will-O-Wisp and slept for another turn, but he got an even more crucial Sleep Powder miss, allowing me to Burn his Dragapult the following turn. G-Max Hatterene in the end game cleaned up his Dynamaxed Conkeldurr and Gastrodon.
Round 2 vs Ben Rollason (W W)
Game 1: I led off with Butterfree and Dusclops while he chose Jellicent and Duraludon. He used Max Lightning and Water Spout on turn 1 and I got up Trick Room, which allowed me to sweep him with Rhyperior.
Game 2: I correctly called that he would immediately go for a Trick Room reversal, so I didn’t press Trick Room, but I wasn’t certain enough in my read to just bring in Rhyperior on the same turn, as if he presses Water Spout I look pretty dumb. Luckily, he wasn’t able to reverse the Trick Room on the following turn because of G-Max Smite.
Round 3 vs Alexandre Lissardy (W L W)
Game 1: He led off with Arcanine and Rotom while I led with Dusclops and Butterfree. He revealed Safeguard on his Arcanine immediately and put me in a pretty passive position. In the endgame, it came down to him hitting two Rock Slides against my Hatterene, and he missed one. This left me with the thought that he maybe had Dark Pulse instead of Crunch on his Tyranitar.
Game 2: He selected the same leads while I switched it up to go with Indeedee and Dusclops instead, since Butterfree doesn’t do a lot in a matchup with Safeguard Arcanine. I wasted too many Trick Room turns while he boosted his Tyranitar with Max Knuckle, so I lost this game.
Game 3: Going into game 3, I knew I had to get my Rhyperior into position earlier. I thought about switching it immediately in versus his Arcanine and Rotom lead but cancelled this selection in the last second, instead going for Psychic into Rotom and Trick Room. He wanted to make the read and used Hydro Pump into my Indeedee and switched out his Arcanine into Tyranitar. My thought process now was, “I can just Follow Me and switch into my Rhyperior the following turn, and then still get one more Trick Room turn with Rhyperior than the last game.” Without him going for Safeguard on the first turn, I freely Burned his Tyranitar and used Psychic again. Unfortunately, he crit my Indeedee with his Tyranitar and Dynamaxed Rotom was able to survive. My Rhyperior came in and I committed way too hard on reading his Togekiss coming in and Rotom going for Max Guard, so that he would be able to redirect my move the following turn. The correct play for me would have been to just stay normal with Rhyperior and press Rock Slide. In the end, Hatterene and Dusclops were still able to clutch out the win, and I took a very close set versus Radium.
Round 4 vs Nils Dunlop (L W W)
Game 1: All I remember is that he got two pretty quick KOs and pressed Perish Song in the endgame with his Lapras. I got some pretty good information going into game 2: for example, seeing that he had Wide Lens on his Venusaur let me plan for the following game.
Game 2: I led with Indeedee and Hatterene and he immediately put my Indeedee to Sleep with his Venusaur, followed up by Throat Chop from Incineroar while I got up Trick Room. The next turn, I switched out my Indeedee for Rhyperior while pressing Psychic into his protecting Venusaur. This left him with a decision: either he uses Parting Shot into my Hatterene, which allows me to get a free switch into Dusclops, or he uses Parting Shot into Rhyperior, allowing me to stay in with Hatterene. He revealed Absorb on his Jellicent to activate his own Weakness Policy, and made some clever Strength Sap plays into his +2 Attack Lapras the following turns. In the end, my +2 Special Defence Dusclops was able to win the 1v1 against his Lapras.
Game 3: I thought my game plan from game 2 was really good, so I used the same for game 3. This time, he changed his Parting Shot targets, allowing my Hatterene to stay in. So, I switched up my Dynamax Pokemon and KO’d his incoming Jellicent with the combination of G-Max Smite and Rock Slide the following turn. Therefore, he wasn’t able to reverse my Trick Room again.
Round 5 vs Selahattin Sturm (L W W)
Game 1: He flinched my Dusclops with his Tyranitar on turn 1 and I was thinking, “well, here we go again!” Afterwards, I had nothing that could withstand the power of his Dynamaxed Tyranitar in combination with Helping Hand from Gothitelle.
Game 2: When I saw the immediate Dynamax from his Tyranitar I was kind of happy, so I got my Trick Room up safely while he KO’d my Butterfree with a combination of Fake Out and Max Rockfall. I got in my Rhyperior safely, and having Brick Break on Dusclops helped me a lot, as I did not activate the Weakness Policy on his Tyranitar and was able to safely KO his Gothitelle.
Game 3: He switched up leads, going for Arcanine and Gothitelle. He used Fake Out on my Butterfree and set up a Safeguard because he hadn’t seen if I’m Scarf Butterfree or not. He left my Butterfree around, allowing it to 2-hit his Gothitelle and redirect attacks from my Rhyperior. I saved my Butterfree allowing me to put his Tyranitar and Milotic to sleep after Safeguard ran out.
Round 6 vs Fevzi Özkan (L W W)
Game 1: Going into team preview, I knew this matchup would be pretty tough, because he had Lapras and Dusclops. But I also realized that he didn’t have a single Fairy resist, making my Hatterene a pretty good win con. He got me good with the Trick Room mind games, and I remember a position in the end where I would win if he didn’t have Perish Song on his Lapras or didn’t get Perish up by hitting himself in confusion. He managed to come through and set up Perish, leaving me with useful information for game 2.
Game 2: Seeing that he didn’t bring Alcremie in game 1, I led with Butterfree this game. This also allowed me to avoid the Trick Room mind games and him being too passive with Alcremie and Dusclops on the field at the same time. This time, he brought Alcremie and Lapras to the field, which was fine by me. I won this game pretty convincingly with Brick Break Dusclops and G-Max Hatterene.
Game 3: I made a mistake midgame by using Brick Break and G-Max Smite into his Alcremie instead of just using Brick Break on the Gmax Lapras to safely break his screens, forgetting that he can Protect with Alcremie for a second. Now I needed to get the confusion hit on his Lapras the next turn, knowing that he would Protect and switch to Dusclops with Alcremie. He got the Protect with Lapras, but I got bailed out by landing a critical hit with Hatterene on Dusclops.
Round 7 vs Eric Rios (L W W)
This game was on stream and you can watch it here.
Game 1: Knowing this archetype from Japanese players, I knew I couldn’t freely lead with Indeedee and Hatterene, as I feared the Choice Band Self-Destruct Snorlax plus Dragon Dance Dragapult. After the first turn, I thought I was in a great position. I could freely G-Max Smite into Dragapult while also covering a potential Ally Switch play from Rotom or a switch out to Mimikyu or Snorlax by using Will-O-Wisp in that slot, since Rotom didn’t apply pressure here. Suddenly, his Dragapult managed to survive the G-Max Smite, which was something I never saw in practice and didn’t even know was possible for it to survive.
Game 2: I was honestly hoping he wouldn’t have Trick Room on his Mimikyu, because I saw a lot of Japanese players opting to drop Trick Room on Mimikyu, choosing to use Protect or another coverage move in the last slot. He gave me an out by using Max Wyrmwind instead of Max Phantasm against my Dusclops, so afterwards I could turn the tables around again.
Game 3: Since all Butterfree had done the first two games was give me a free switch to my Trick Room sweepers, which is not helpful in this matchup against bulky Dragapult and a Disguise Mimikyu, I selected Indeedee instead in order to redirect any ghost type moves from Dusclops. Knowing I do not really benefit from setting up Trick Room in the beginning as his Mimikyu can always reverse it with such a passive lead on my end, I opted to burn his Dragapult the first turn instead, which was a pretty safe play to make. I then played some pretty good Trick Room mind games afterwards, which you should definitely check out for yourself by watching the match.
Round 8 vs Alex Gomez (W)
No breaks for me at this event; after coming back from the streaming area to play the next round, I saw I had to play another great name. My friend Alex was already waiting for me and told me that he isn’t going to play this last round. It was a fair decision to not reveal if he had something different to Eric on his team, and it also helped out Eric and Fevzi’s resistance if they weren’t able to get their 7-1.

8-0 T O P C U T B O I S!!
I was happy that Fevzi also made it, and with him becoming 2nd seed we would not be playing again before finals. I was really satisfied with my play during that day, and I’d honestly already achieved more than I expected from this event. Thanks to the near-flawless tournament organisation, we were able to finish 8 rounds of Swiss at around 6 PM, so there was enough time to get dinner in good company and to prepare for Top 8 afterwards.
Top 8 vs Jamie Boyt (L W W)
Preparation: Looking at his team, at a first glance, he didn’t seem to have much for Trick Room. I was pretty certain that he would have Imprison and Trick Room on his Gengar, because normally people tend to run Imprison Chandelure on this archetype, which is usually not a good answer against my team. I was expecting a Gengar and Inteleon lead from his side, but not knowing his full Inteleon set was also kind of troublesome. I knew that this matchup was pretty easy if he didn’t have both Dark Pulse on Inteleon and Imprison / Trick Room on Gengar, so my main goal was to scout for that in the first game and maybe get the information about whether his Inteleon has Snipe Shot or Hydro Cannon. Knowing Boyt, I was expecting Hydro Canon.
Game 1: I led with Hatterene and Indeedee, and he went with (as expected) Gengar and Inteleon. I took my time and thought a lot about this turn, knowing the potential outcomes from preparation. I used Psychic with Indeedee into his Gengar and protected my Hatterene, not trusting him to go for Imprison. He revealed Max Darkness from Inteleon on the first turn and Imprisoned a potential Trick Room. I placed myself in a pretty good position with some switches. I sacrificed my Torkoal to his double target into my Dusclops while KO’ing his Gengar with G-Max Smite, leaving Inteleon confused on the field with Dynamax ending. I then had Dusclops and Hatterene against his Charizard and Inteleon. I tried to, finally, set up Trick Room with Dusclops, but he came through confusion and crit my Dusclops with Dark Pulse from Inteleon, finishing off the job with Blast Burn Charizard. Depending on his special investment with Charizard, I had a chance to survive it, but when you factor in the flinch chance from Dark Pulse, the odds were in his favour.
Game 2: I changed my leads by going for Rhyperior and Indeedee instead, wanting to immediately KO his Gengar and then set up Trick Room in the late game. With him leaving Inteleon on the bench for this game, I had no issues of getting rid of his Gengar, allowing me to set up Trick Room with Dusclops while my Indeedee got KO’d. He used Scary Face on his own Rotom-M to get it to -6 Speed, but Dusclops and Hatterene were already too slow, and they finished off that game for me.
Game 3: He went back to his lead from game 1, and I did so as well. Now, I had to make the read turn 1 on whether he’d use Imprison with Gengar or just attack. I made the right play by attacking with Indeedee and going for G-Max Smite into his Gengar, KO’ing it turn 1 as he tried to Imprison and went for Max Darkness again. On the following turn, I redirected to sacrifice my Indeedee. He came through his confusion again, and was able to get the KO on my Indeedee while dropping my Special Attack with his Charizard. I got lucky KO’ing his Inteleon with a critical hit. Now I was pretty free to set up Trick Room and clean up with my Hatterene. Without that crit. the game would have been much closer. but I still had decent odds to win with Dusclops and the power of G-Max Smite, especially with a full HP Torkoal waiting in the back.
Top 4 vs Alex Gomez (L W W)
This game was on stream and you can watch it here.
Game 1: Going into this set, I felt the game plan I had against Eric in game 3 was the best possible one against that team. I played the beginning of the game well, putting myself into a position where he could not freely reverse my Trick Room and called the Protect from Rotom-W, which put me 3-1 ahead. Afterwards, he managed to, unfortunately, get a double Protect with his Rotom and I did not play the endgame optimally, which allowed him to steal that game from me.
Game 2: He made an adjustment by leading Togekiss next to Dragapult, which allowed me to not play Trick Room mind games in the beginning, but also allowed him to redirect my Will-O-Wisps against his Dragapult and set up freely with Dragon Dance. Therefore, I set up Trick Room directly and went with Psychic to put his Togekiss in guaranteed KO range from G-Max Smite. Indeedee surviving the combination of Dazzling Gleam and Max Wyrmwind was pretty crucial, as I could redirect again the following turn.
Game 3: This time, I opted to immediately redirect with Indeedee since I had not done it in either game so far and was fearing a hard read from Alex, targeting down my Dusclops. He targeted down my Indeedee with Max Wyrmwind and Play Rough, but he needed to get two good rolls to get that KO. He did not get the KO, but I also proceeded to miss the Will-O-Wisp against his Dragapult, which put me way behind. Without that miss, I would have been in a pretty strong board position. I got my Trick Room up the next turn and thought, “it’s now or never”, as I really needed the self-hit with G-Max Smite against his Dragapult, so I went full YOLO mode. In hindsight, the better play would have been to out stall his last Dynamax turn with Max Guard and then get either the self-hit or flinch against his Mimikyu. There was a visible bug in our game as well, where the game said that the Disguise on Mimikyu was broken, but looking at the animation afterwards in-game made me think that it is still intact. This bug nearly cost me that Game 3.
Finals vs Alexandre Lissardy (W W)
This game was on stream and you can watch it here.
Game 1: Knowing this matchup from Swiss, I already knew that I could set up Trick Room pretty safely with Dusclops while chipping away the Pokémon next to Indeedee with Psychic. I played a bit too aggressively in the beginning, letting my Dusclops get KO’d by Tyranitar. Realising that it would be tough to get a 2nd Trick Room up from that point on, I activated the Weakness Policy on his Tyranitar to chip it into -1 Hammer Arm range. Suddenly, I was in a good position against his Rotom-W, which could not Protect, and Tyranitar with 2 Trick Room turns remaining.
Game 2: After seeing that he did not bring any Pokémon next to Tyranitar which could take the Max Rockfall from Rhyperior in the first game, while also wanting to save my Dusclops to get a possible late game 2nd Trick Room, I switched it out after setting up the Trick Room. He made a good adjustment by bringing in Excadrill this game, which meant my Rhyperior could not freely sweep. After his Tyranitar went back to normal, we had a mind game about whether he’d switch in Togekiss and Protect the other slot or not (in order to get the redirection and attack the following turn and stall out Trick Room). I realised that I could punish that by going for Max Rockfall, so I decided that he probably stays in. Pain Split against his Togekiss allowed me to regain enough HP on Dusclops to set up another Trick Room.
Conclusion and Shoutouts
I did it! I finally won and went undefeated with the toughest schedule I have ever played at a Regionals! I’m so happy, grateful, and satisfied with my play throughout the two days.
I think the core around Indeedee, G-Max Hatterene, Dusclops, and a Rock Type (Rhyperior / Tyranitar / Gigalith) is an archetype which should be respected in the future and still has potential to be built even stronger.
Most shoutouts have been made in the text, but I want to thank the following:
My family and friends supporting me
All the people that cheered for me during the days
My local friend Christian Franck who made this trip to Malmö even more amazing
Labhaoisa Cromie for reading over it
Victory Road and Trainer Tower for publishing it